Pixel & CAPI setup · Part 1 of 2

Create your Meta App, Pixel & Access Token

The part everyone gets stuck on. By the end you’ll have a Pixel ID and a never-expiring Conversions API token — every screen below, with screenshots.

1
Step One
Create Meta Pixel & Access Token
Important: Create 1 separate pixel for each creator. Do NOT share pixels between creators.
Before you start: your personal Facebook account needs two-factor authentication enabled — Meta blocks developer tools & System User tokens without it. You'll also need a Business Manager (business.facebook.com).
1.A Create the Pixel — Events Manager
  1. Go to Meta Events Manager
  2. Click "Connect Data Sources""Web""Meta Pixel"
  3. Enter pixel name: Your Model - OnlyFans
  4. Copy your Pixel ID (example: 1881842942413828) — keep it for Step 3
1.B Create the App & link it to your BM — developers.facebook.com
  1. Go to developers.facebook.com"Get Started" → register as a developer (verify email/phone, accept terms). Your account is now in developer mode.
  2. My Apps"Create App" → pick the first two options offered (wording changes often; the default business path is fine). The name doesn't matter — go to the end.
  3. Copy your App ID (top of the app dashboard).
  4. Link it to your BM: Business Settings → Accounts → Apps"Add" → "Connect an app ID" → paste the App ID.
If the "Generate token" button is grayed out later, it's almost always because the app isn't linked to your BM here.

The app is what the System User token will be issued against.

1.C Create a System User
  1. Go to Business Settings → Users → System Users
  2. Click "Add" → name it 
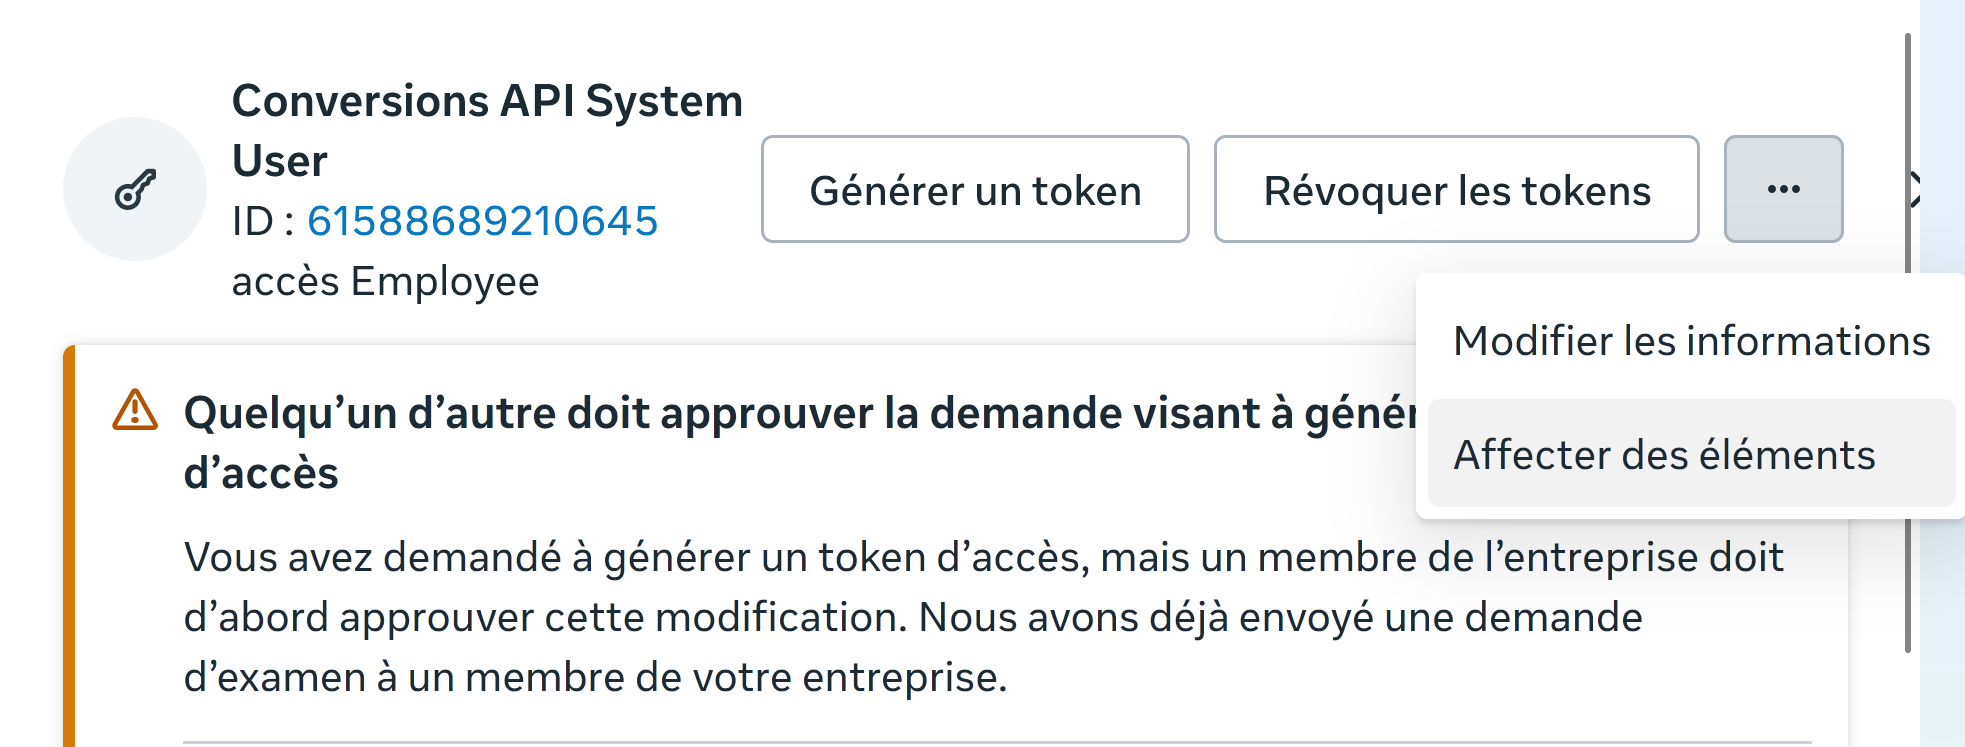
Conversions API System User → role: Employee
If Meta support says they'll "prepare a different Business Manager" (common when your ad account/pixel lives in another BM): switch to that new BM and create the System User + generate the token there, then assign the assets on it. Generating the token on the old BM will silently fail or produce a token that can't write.
System Users list
The System User shows up in Business Settings → Users → System Users.
1.D Assign assets to the System User

Open the System User and click the ··· menu → "Add Assets" (FR: Affecter des éléments).

System User detail with Add Assets menu

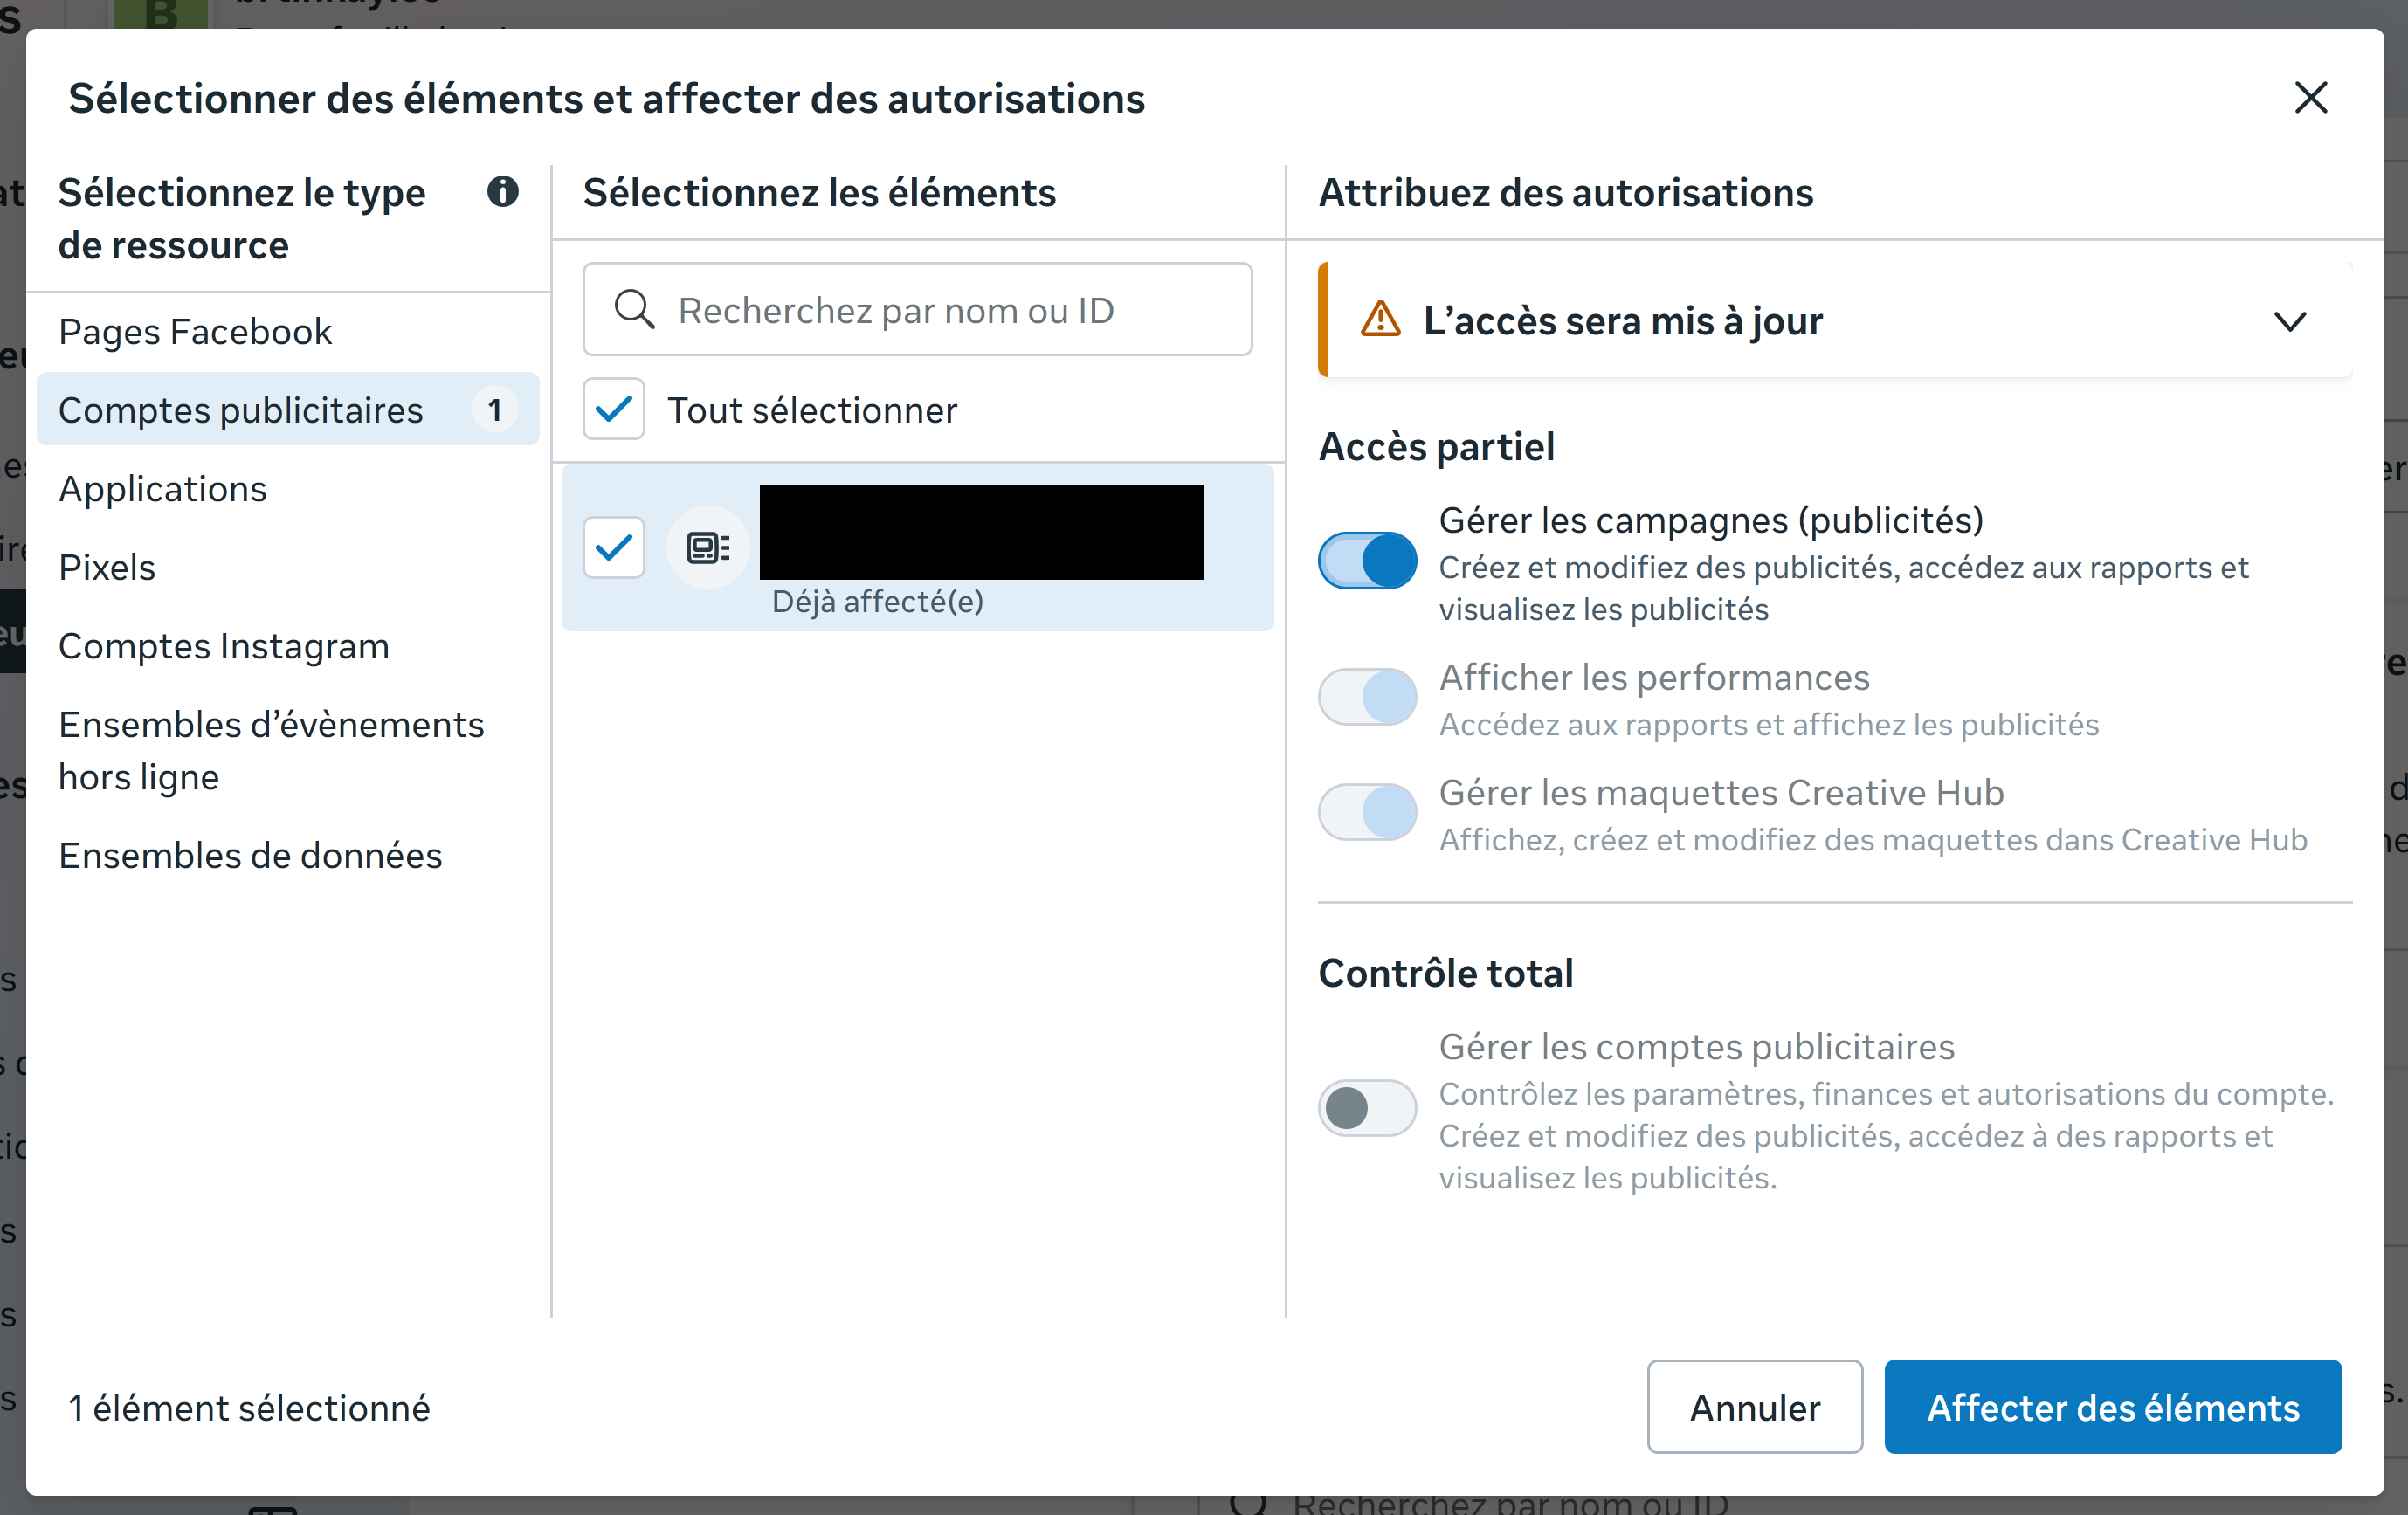
Assign the following three asset types:

Asset 1
Ad Accounts Comptes publicitaires

Pick the ad account you'll run ads from → Partial access → "Manage Campaigns" (FR: Gérer les campagnes).

Ad Account asset assignment
Asset 2
Apps Applications

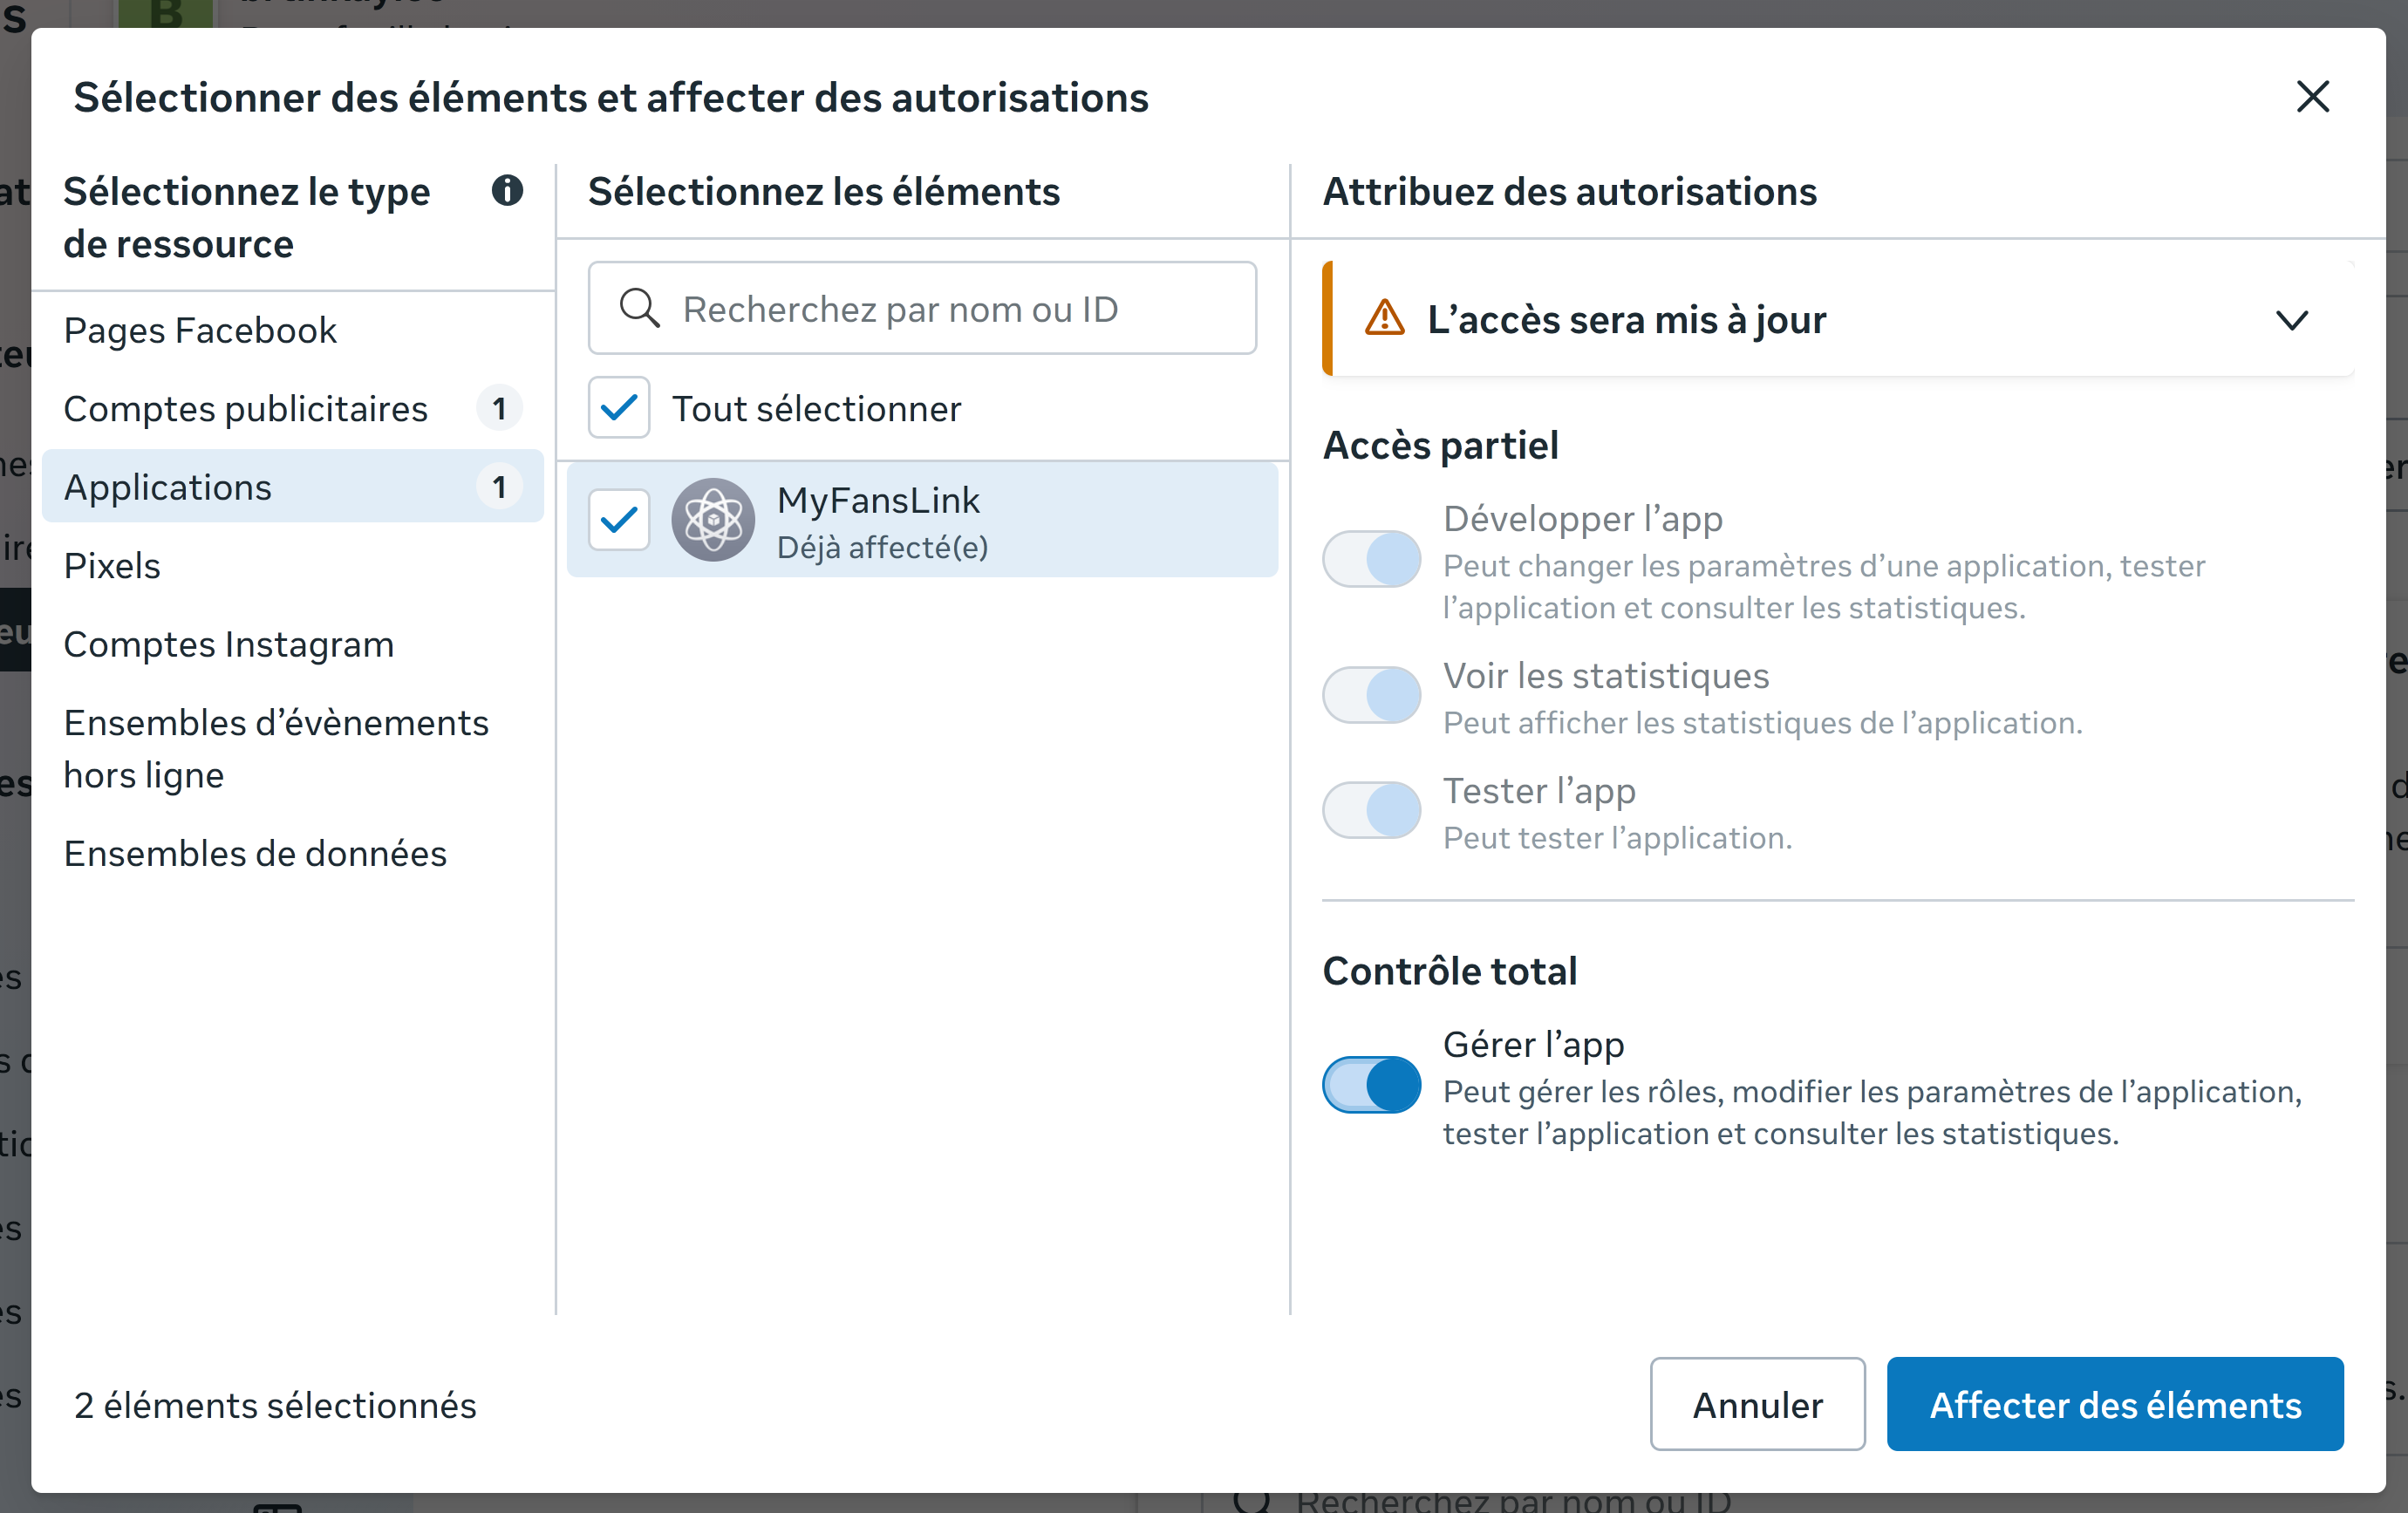
Pick the app from 1.B → Full control → "Manage app" (FR: Gérer l'app).

App asset assignment
Asset 3
Datasets Ensembles de données (formerly "Pixels")

Pick the Pixel from 1.A → Full control → "Manage the event dataset" (FR: Gérer l'ensemble de données d'évènements).

Datasets asset assignment

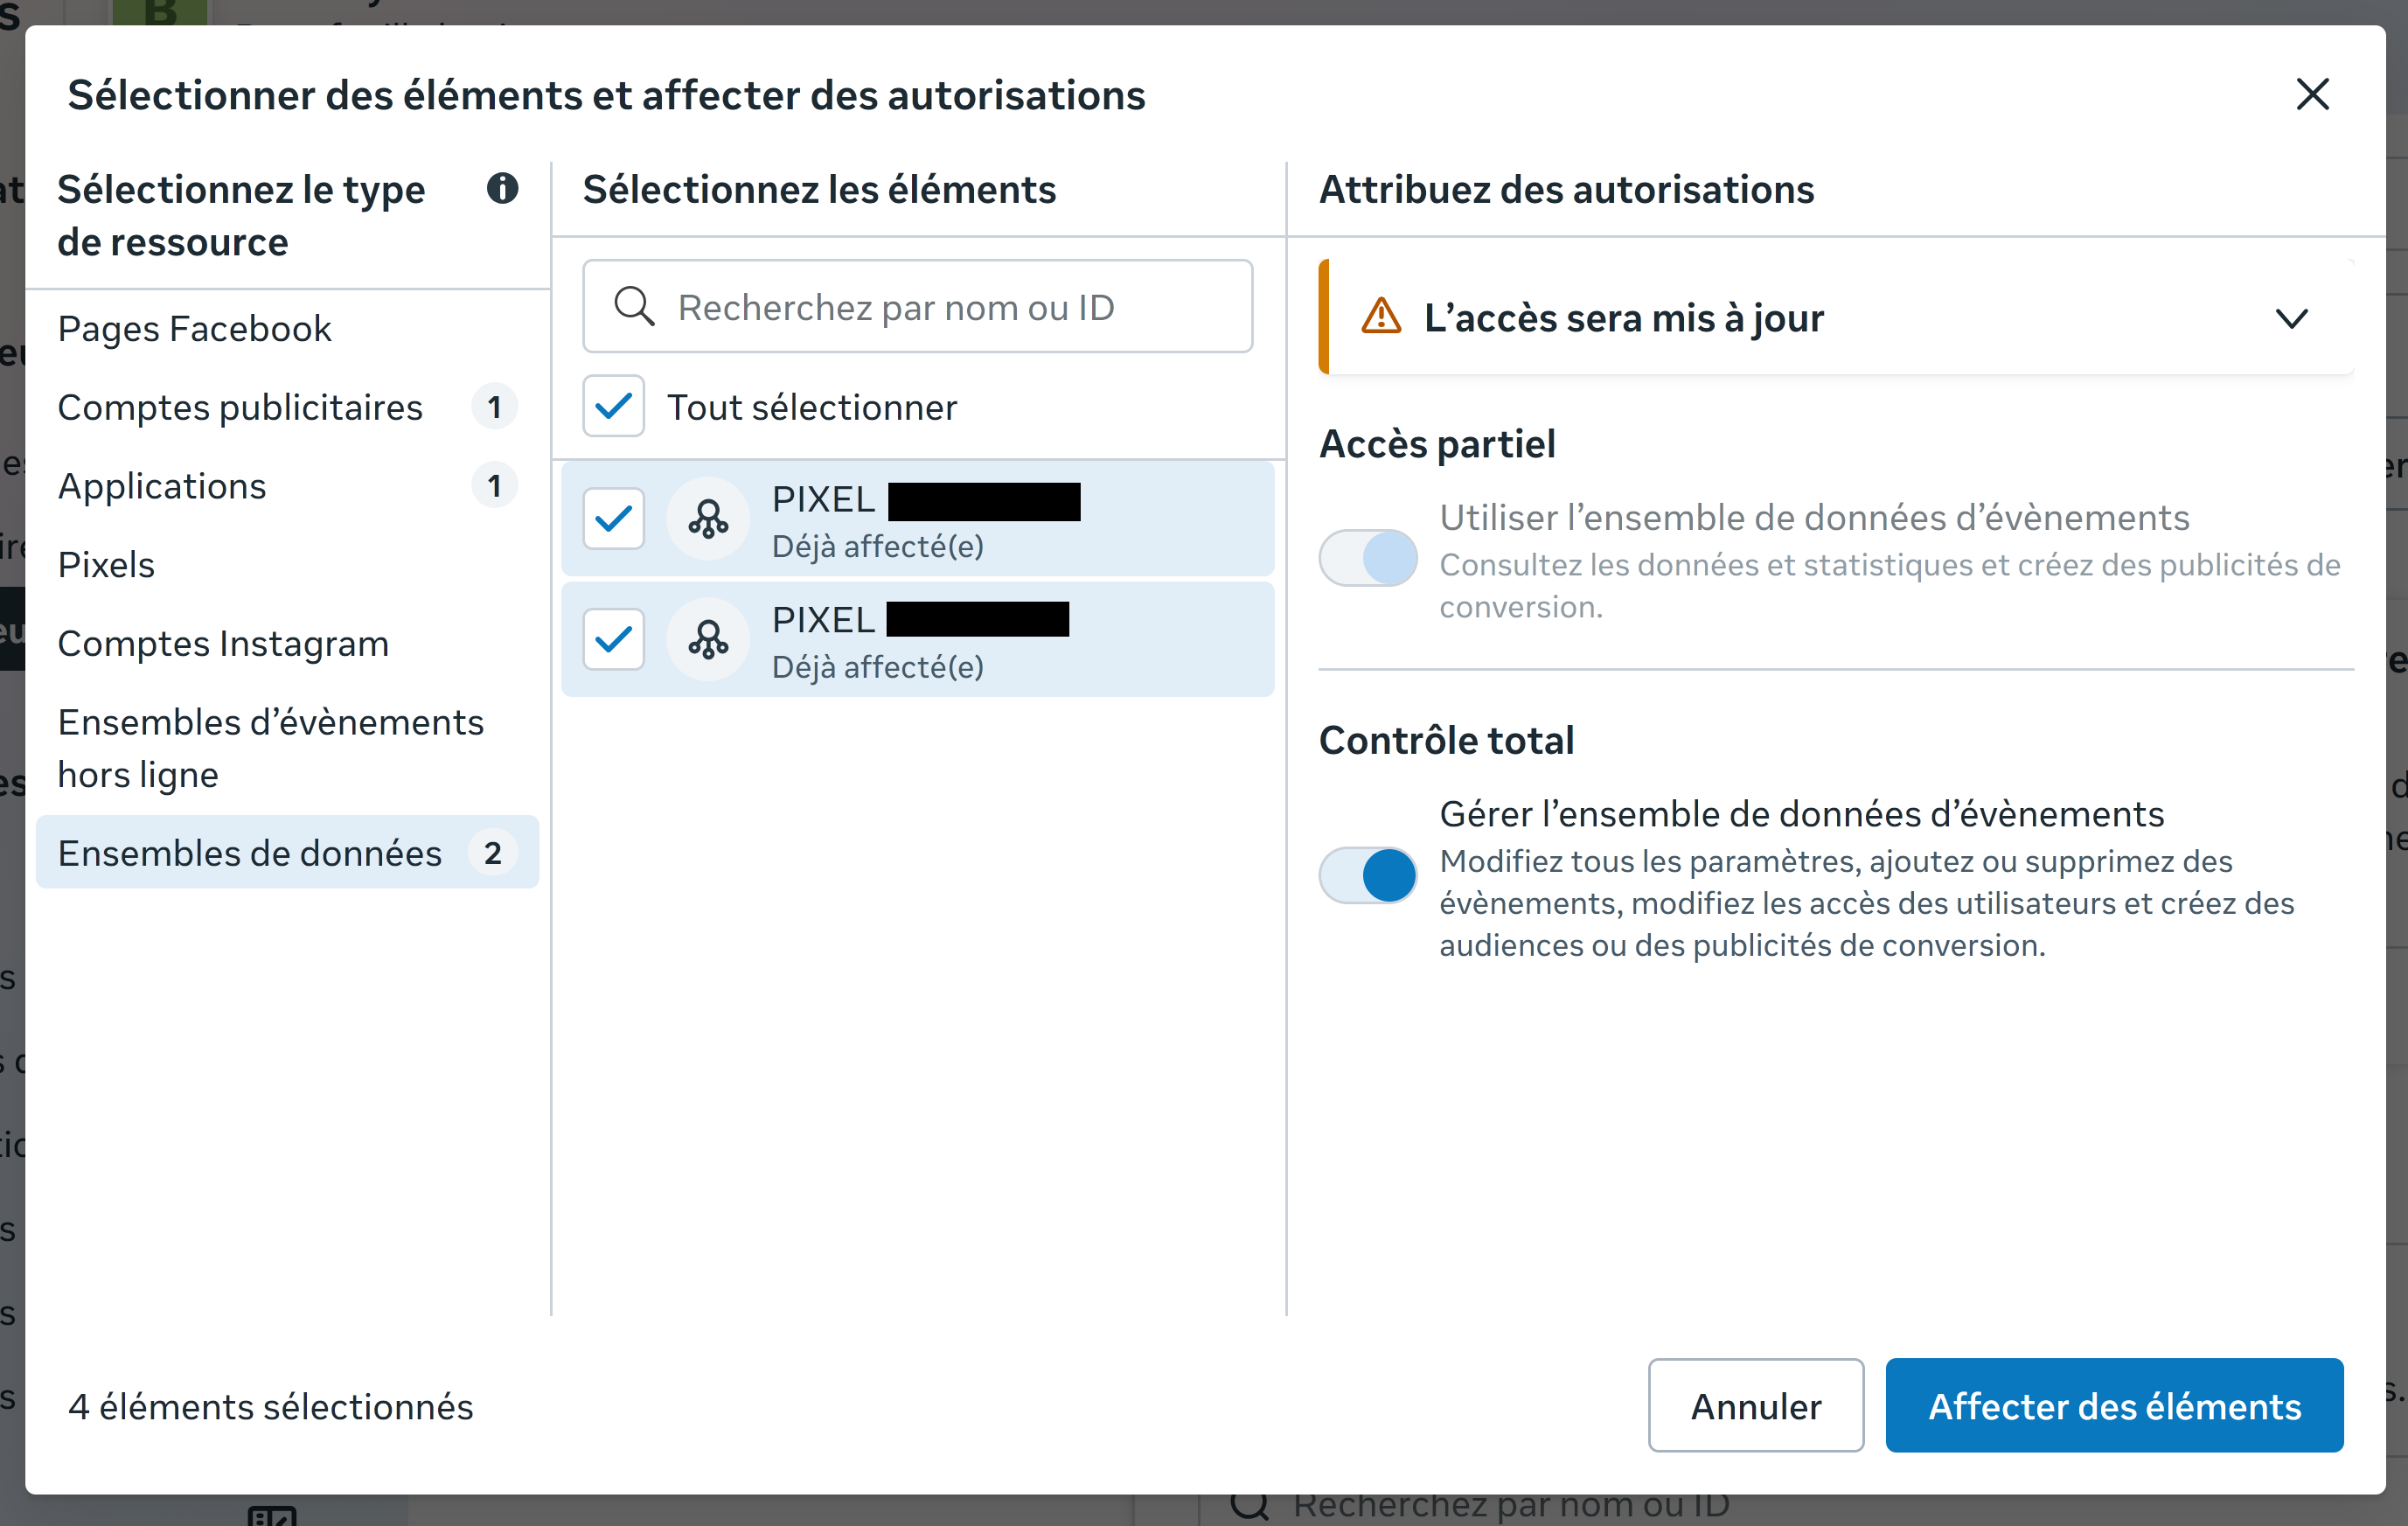
Note: Meta merged Pixels into "Datasets" — same thing, new name.

Pixel owned by an agency or another BM? You can't assign it until they grant access. Ask them: "Please give me (or my system user) access to the ad account that has the pixel, so I can write to it with my system user for the Conversions API."
1.E Generate the Access Token

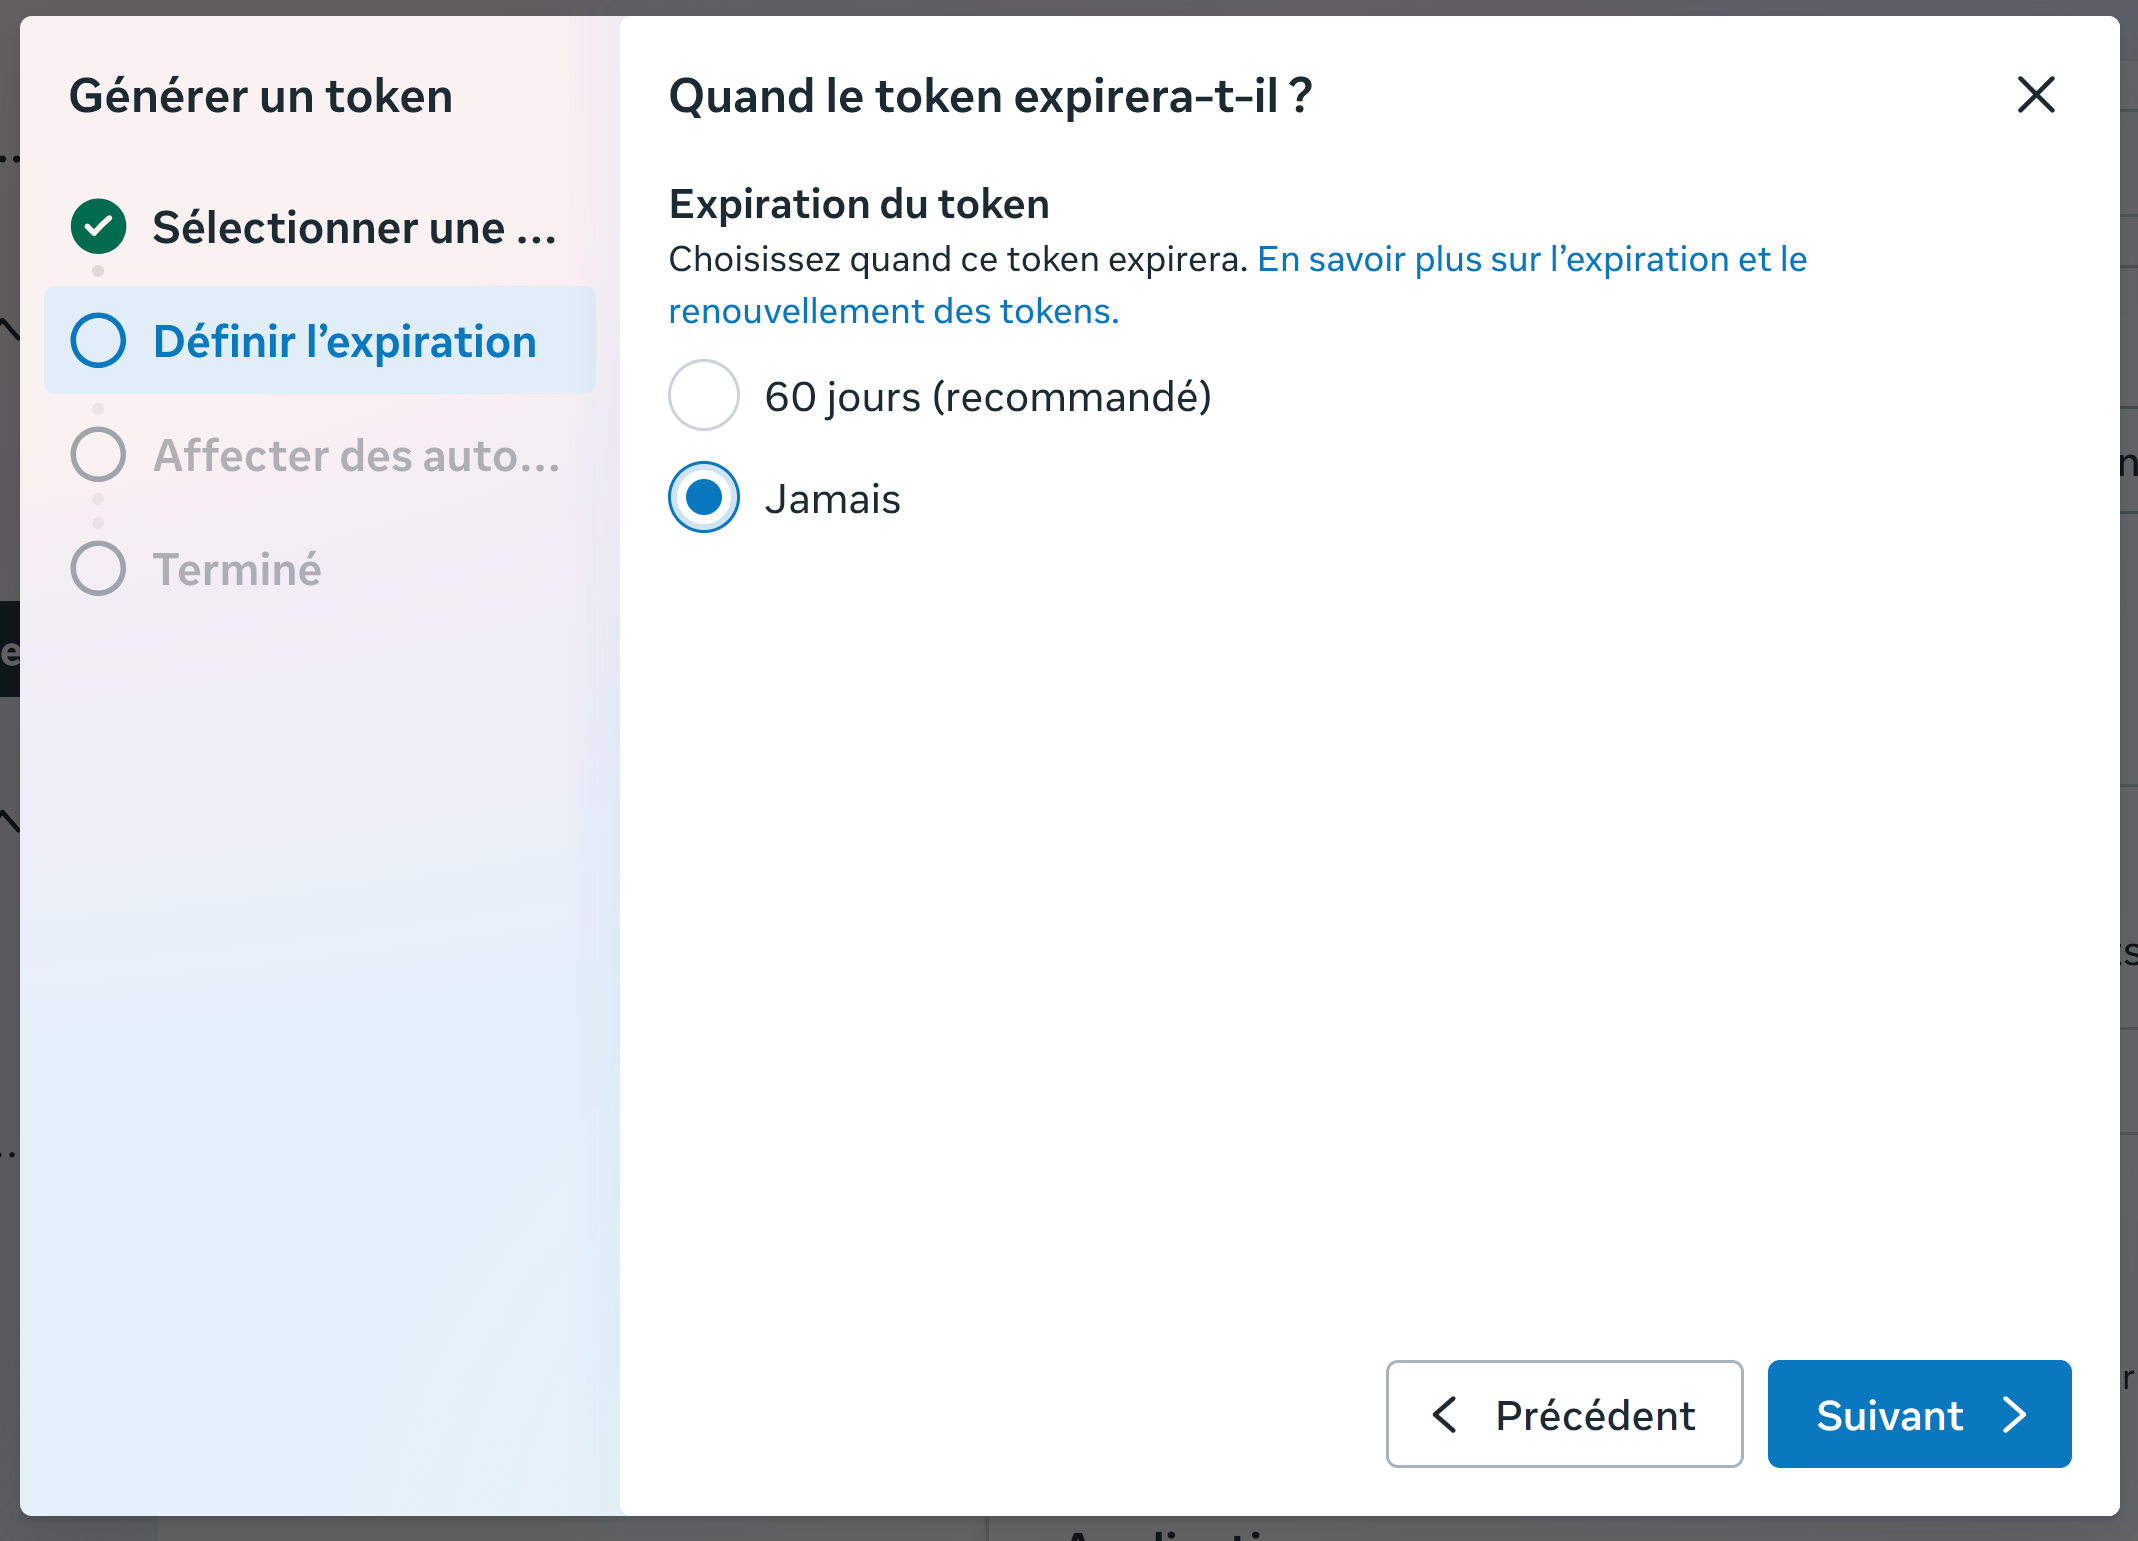
Back on the System User page, click "Generate New Token" (FR: Générer un token) and walk through the 3 steps:

Step 1
Select the App

Pick the app from 1.B (e.g. OnlyFans Pixel).

Token: select app
Step 2
Token expiration

Choose "Never" (FR: Jamais) — recommended for server-to-server CAPI.

Token: expiration
Step 3
Permissions (3 scopes)
  • ads_management
  • ads_read
  • business_management
Token: permissions
Click "Generate Token" and copy it (starts with 
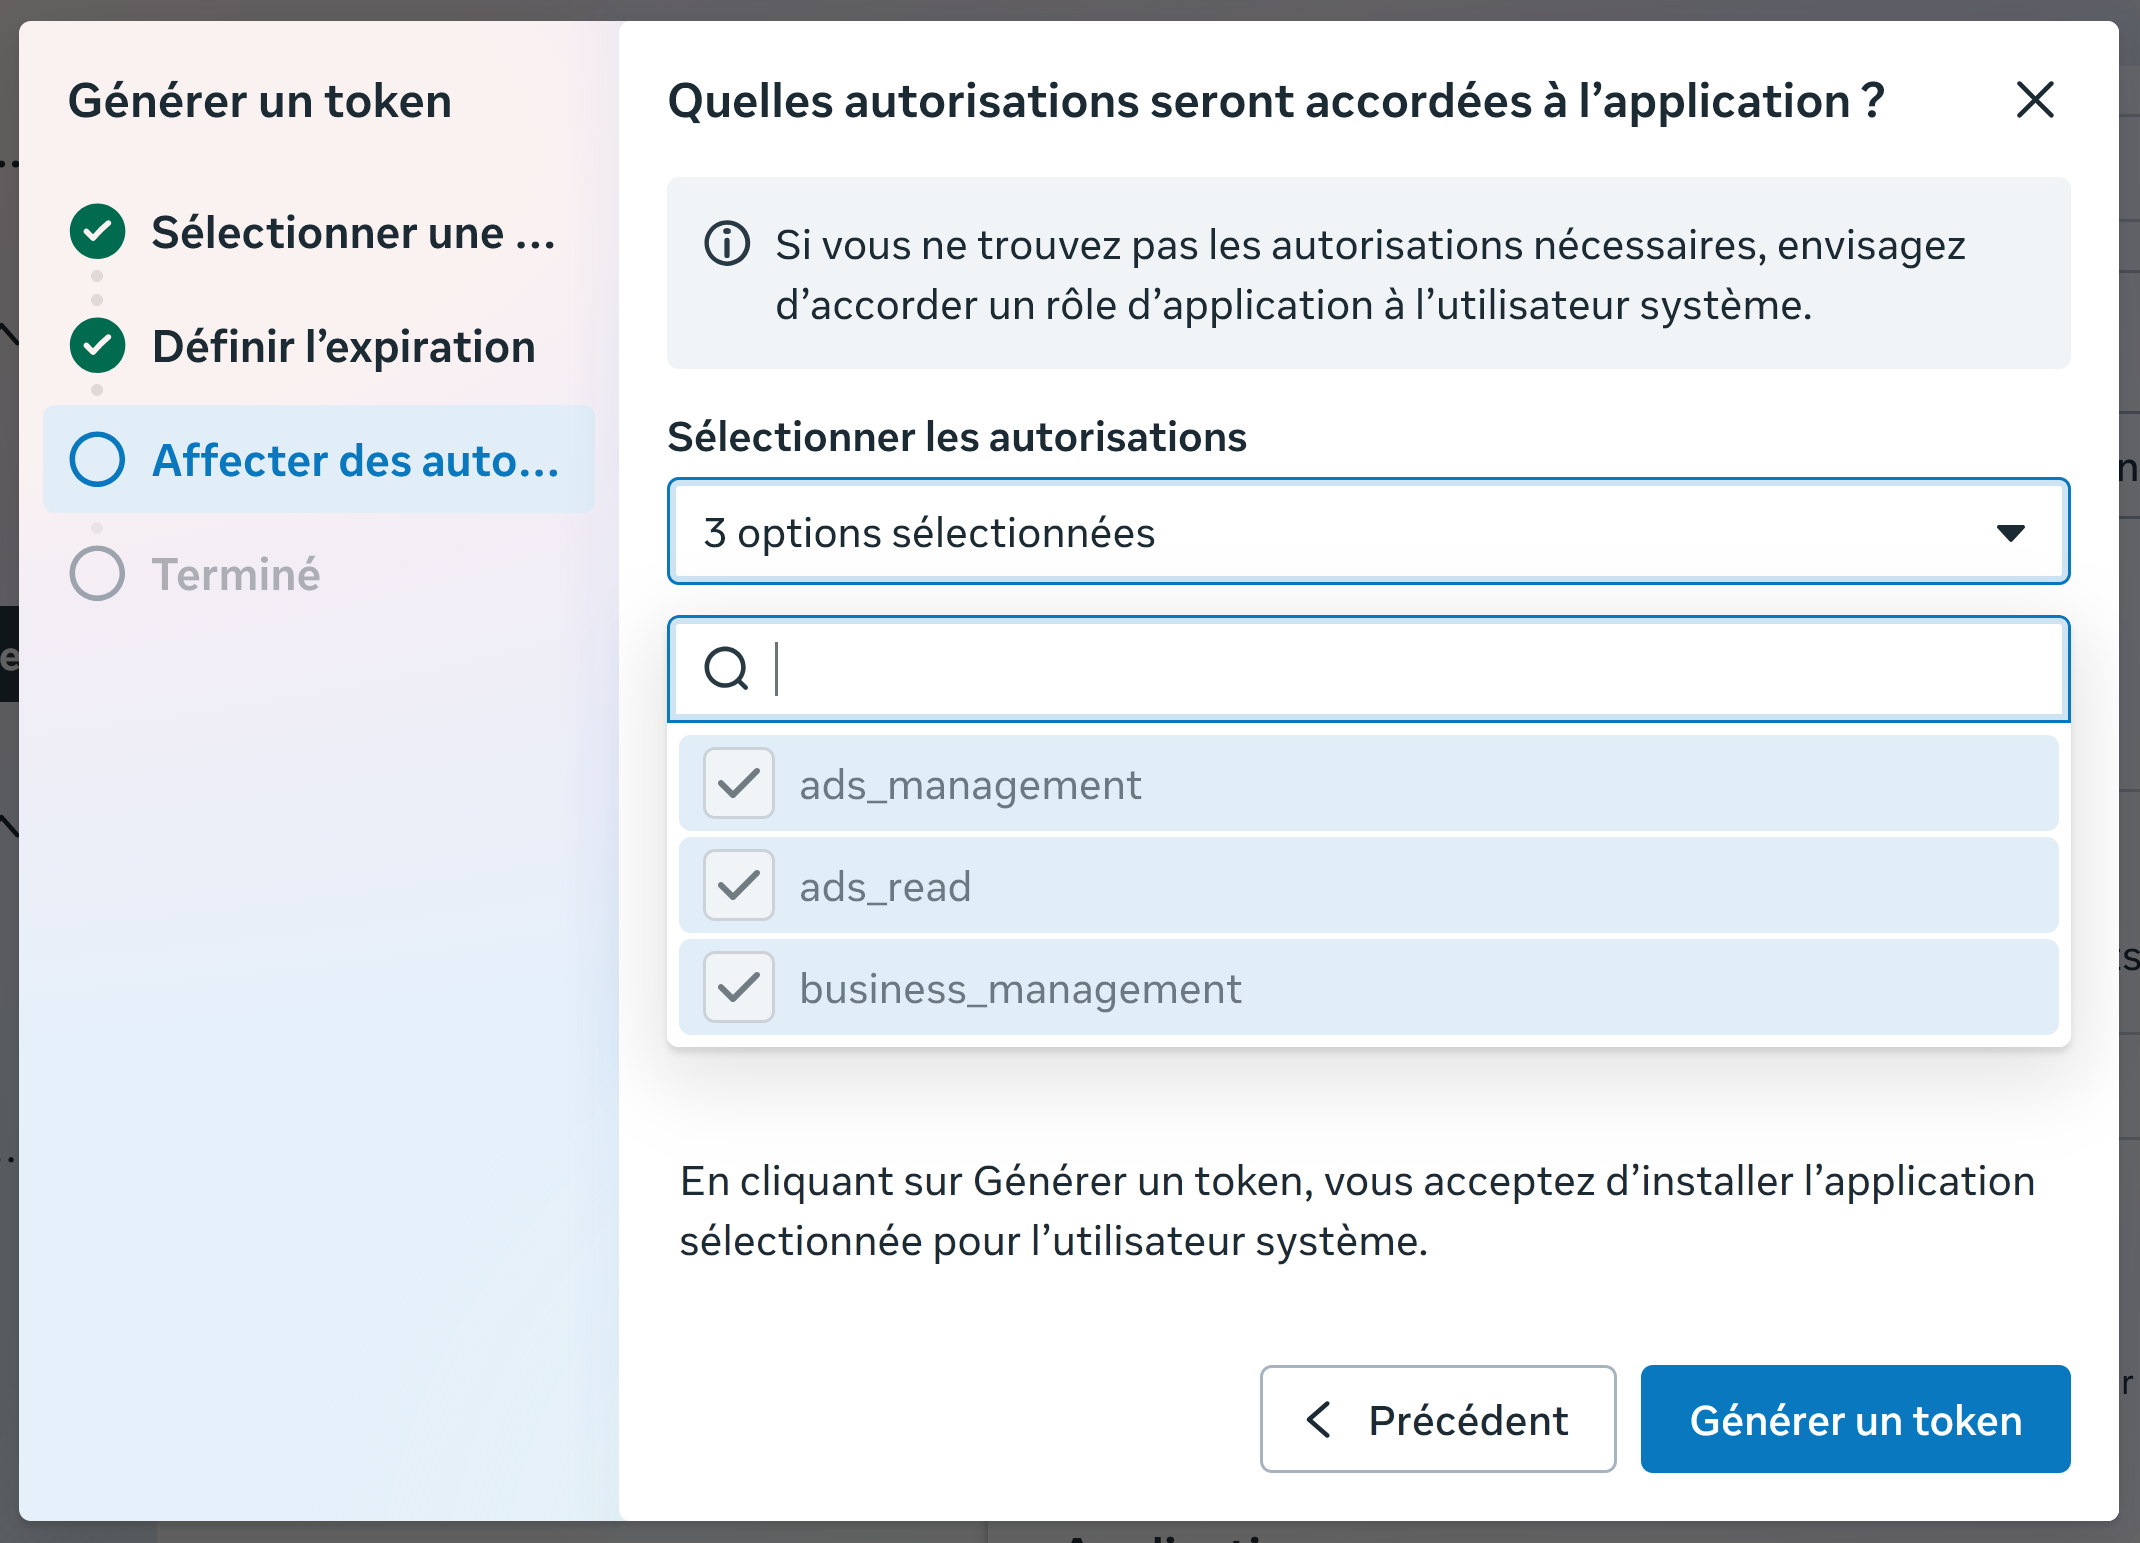
EAA...) — keep it for Step 3 of this guide. The token is shown only once. Store it safely.
Why both? Conversions API sends events from the server (not blocked by ad blockers or iOS). Meta Pixel sends from browser. Together = 95%+ tracking accuracy vs 50–70% with pixel alone.

Next: verify your domain & connect

Got your Pixel ID and token? Part 2 verifies your domain, allow-lists it, and connects the credentials to OnlyFans Pixel.